How to Design a Cover Page Using Indesign
Create a stylish book cover by customizing a professionally-designed template from Adobe Stock. Make it your own by changing the typography, artwork, and colors.

What you'll need
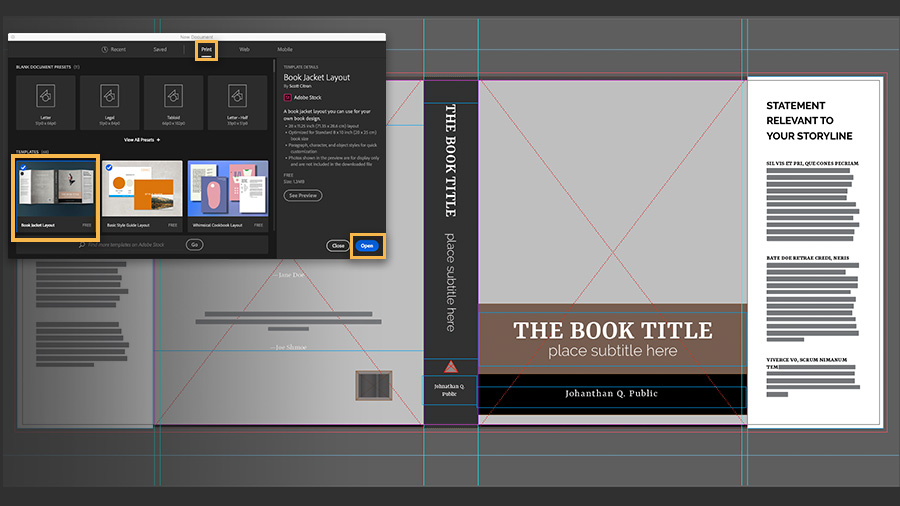
After launching InDesign, click Create New in the Home Screen or choose File > New > Document. Click the Print tab at the top. Locate Book Jacket Layout in the Templates section below and click Download. When it's finished downloading, click Open.
Note: You may see the Missing Fonts window if the template uses any fonts not installed on your computer. Click Activate and the type in your template will appear as designed. You can always change the fonts later.
When the book jacket design opens, you'll see various design and layout elements, guides, and placeholder text. You can customize these freely.

With the Selection tool, click any object you want to remove, and then press Delete.
To delete partial text within a text box, triple-click the text with the Type tool, and then press Delete.

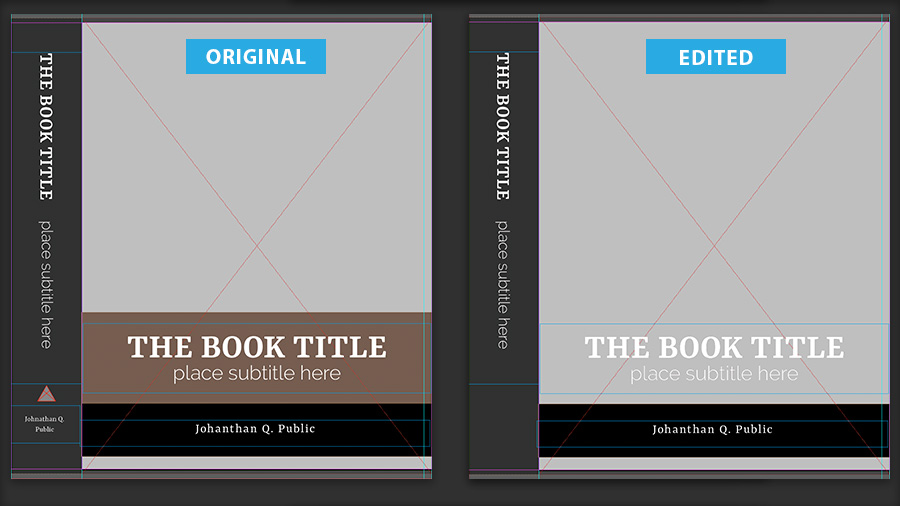
Select the Rectangular Frame tool and drag to create a frame that surrounds the front cover page. Make sure it extends to the red bleed lines at the top and bottom to ensure that your art prints correctly to the very edge of the paper.
You can search Adobe Stock directly from the CC Libraries panel in InDesign.
- Click the CC Libraries tab or choose Window > CC Libraries.
- Type in the Search Adobe Stock field at the top.
Note: Make sure that "Search Adobe Stock" appears in the Search field before typing, or choose it from the menu.
- When you find an image you like, drag it over the selected frame and click to drop it in place.

To make the image fill the frame, try clicking one of the Fitting commands in the Frame Fitting section of the Properties panel.
You can also change the stacking order of the photo in the layout. With the photo selected, click Arrange in the Quick Actions section of the Properties panel. Then select Send to Back.

With the Type tool, select the headline text and replace it with your own text. You can replace longer text just as easily — simply select the text you want to replace with the Type tool and paste text from your clipboard. The new text automatically uses the formatting specified in the template.
Not the right style or size? Change the appearance of the text in the Character section of the Properties panel. Select a font installed on your computer or choose from thousands of Adobe Fonts.
To change the font size visually, tap the up or down arrow to the left of the Font Size field until the headline looks right to you.

Select the Eyedropper tool and click an area of the image to sample a color. The Eyedropper tool's appearance changes to a "loaded" icon. Drag it across some text to apply the color; you can apply the same color to multiple text objects in this manner.
Practice sampling colors from the image and applying them to text on the page.

If you're ready to license the Adobe Stock image you've previewed, select the Adobe Stock image you placed with the Selection tool. Click the shopping cart icon that appears in a corner of the image to license it.

Now you see how starting with a template can help you get to a finished design that's tailored to your taste.

How to Design a Cover Page Using Indesign
Source: https://helpx.adobe.com/stock/how-to/design-book-cover-template.html
0 Response to "How to Design a Cover Page Using Indesign"
Post a Comment